Alight Motion is a powerful video editing and animation maker app. The Alight Motion app offers vast effects, tools, and filters to create mesmerizing content. We have already provided a complete guide on it.
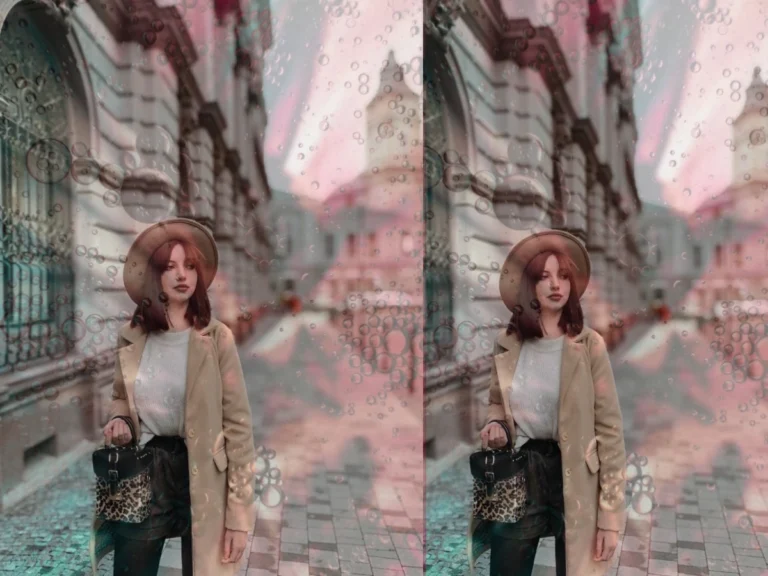
Today, we provide a hands-on tutorial on How To Edit 4K HDR video in Alight Motion app.
This video effect is trending on social media, especially on TikTok. We can guarantee that you can easily create this stunning 4K video edit using Alight Motion in just 10 minutes by following this guide.
So, let’s dive into the details and learn to transform your regular videos into eye-catching 4K edits.
| App name | Alight Motion MOD APK |
| Genre | Photography, Video Editors and player |
| Latest Version | 5.0.261 |
| Size | 100 MB |
| Developer | Alight Creative |
| Ratings | 3.8★ |
| AM Mod info | Pro Unlocked [For India] |
| Required | 7.0 |
| Google ID | com.alightcreative.motion |
| Updated On | May 21, 2024 |
What is 4K Editing and What Does It Do?
Before we dive into how to edit 4K HDR video in Alight Motion, let’s take a quick overview of this edit effect. This refers to videos that have been edited and exported at a resolution of 3840 x 2160 pixels. The 4K edits videos look four times higher quality than HD resolution.
With 4K editing, you can create sharper, more stunning visuals, ultimately providing a more detailed viewing experience for your audience.

This special video format is often used in professional videos, like films and stories, that we see on big screens. However, the trend has shifted towards short-form videos. You can achieve this by following the steps below.
How To Edit 4K HDR Video In Alight Motion by Combining Different Effects
Open the App Interface and Create a New Project
To start creating 4K video edits in the Alight Motion app. Firstly, download the free Alight Motion app from the Google Play Store or App Store and install it on your phone. After that, open the app & locate the green plus button at the bottom of your mobile screen, and click on it.
Subsequently, the most important part of video editing is choosing the perfect size of your video for the specific platforms where you want to submit your content. Different platforms have different size requirements.
For YouTube long videos, you can choose widescreen 16:9. For short videos on platforms like TikTok, Instagram Reels, and YouTube Shorts, a 9:16 aspect ratio is preferred. keep the resolution at 1080p (FHD), frame rate at 30 fps, and background color set to light gray. Thats it! now click on “Create Project”.
Upload the Video in Alight Motion
Similarly to other apps, uploading images in the canvas is very simple. Simply, put one’s finger on the green (+) symbol. This is located on the left bar of your mobile screen. After tapping the “+” symbol, a new window will open at the bottom of your screen. Simply select the video you want to upload.
Henceforward, your gallery videos are open, but it shows only recent photos if your desired photo isn’t there.
Don’t worry! Click on any folder displayed on the left and navigate to the folder where your desired photo is located. Then, upload it.
Applying the Effects on Your Videos to Make Them Incredible
Now, your video is uploaded to the app canvas bar(editing place).
- After uploading, you’ll see another green (+) icon on the left side of the bottom bar. Feel free to click on it.
- Open Features Library: After clicking this, the Alight Motion app’s features library, including shapes, media, audio templates, and more opens on your mobile screen.
- Select A Shape: At this time we need a rectangle shape, usually, it appears in the first row, and at the second number feel free to click on it.
- Change the color: When we choose the rectangle shape it’s yellow by default. However, we need a white color. So, click on “Color and Fill,” then select white.
- Increase the Shape Size: To do this, simply click the back button (one step back) and then drag the shape to cover your entire video.
- Blend the shape: Simply, tap on your selected shape and access the Blending and Opacity features from the left screen bar (typically found in the second row).
- Apply Overlay Effect: After clicking on the blending and opacity, different effects like lighten, darken, and contrast open in the new tab. Simply click on the contrast and choose the first effect overlay effect. With this, our videos look more brighter than before, if you think it’s high. Don’t worry! Alight Motion allows you to adjust the opacity according to your preference.
- Choose one more shape: To choose the second shape, click on the screen’s left side anywhere and click on shapes. Then, tap “Shapes,” select a rectangle, change its color to blue, and drag it to cover the entire screen.
- Apply Effects on this layer: In this step, you need three effects. Go to the effects panel and select them one by one: first, Copy Background, then Exposure/Gamma, and finally, Gaussian Blur standard settings. You can easily find these effects from the app if you don’t want to use the search bar.
- Adjust settings: Modify the exposure and Gaussian Blur settings. The ideal exposure value should be around -1, and for Gaussian Blur, adjust the intensity to 0.405.
- Alight Motion app’s Difference Blending Effect: Your 4k video edit is 95% complete with just five steps. In this step, go to the Blending and Opacity menu, and choose the contrast effect option.
- Add A White Color Shape: At this moment, we need a once more white color shape. You can follow the 2 and 3 steps in the guide.
- Apply contrast overlay effect: follow the 7 steps and apply the contrast effect from the blending and opacity menu and overlay the contrast.
- You’re almost there! Drag all three layers to cover the entire video. Hold down a layer, drag it to the end of the timeline, and click the “Expand” icon in the right bar to stretch it to the full video length.
- Add music: The Alight Motion App also lets you add music to your videos, simply click on the (+) icon, select the audio option, and upload the music file.
- Export Your 4K Video: Your 4K edited video is now ready to download. Preview it, then click the export icon and choose the 4K (2160p) option. Congratulations! By following these steps, your video is prepared to shine online.
Final verdicts
In conclusion, in this guide, we learned what 4K resolution is and how it elevates your video quality. This guide empowers you to create stunning 4K videos that will impress your audience. So follow all the steps we provided and take your social media videos to the next level.